This content about hydraulic pumps is from FluiDyne, a partner of DirectPneumatics.com.
![]()
John Harrison (00:05):
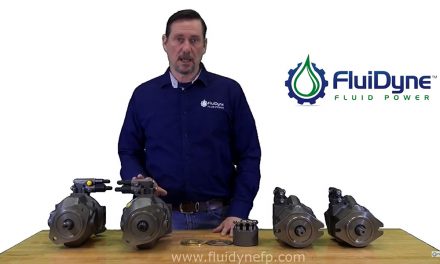
I’m John with FluiDyne and what we’re going to go over today is how to build a simple V 20 pump. We’ve already got all the components here, the body, the cover pressure plate, plus pressure plate spring, O-rings, shaft and bearing cartridge, kit, cartridge, kit pins. So the first thing you want to do is install the shaft seal and press it all the way down. So it’s flush down to the bottom. Once you do that, you can set it with the shaft seal facing up at any kind of pedestal or a bench or something with a hole in the bottom of it, because the shaft is going to go all the way through. So you want to just line the shaft up precedent as far as you can by hand and then get a hammer and just try and tap it in the rest of the way. So it sinks all the way down inside.
John Harrison (00:45):
If it doesn’t go in initially just tapping it or just, you know, flip it over and then we’ll just center it. You got to make sure it’s centered in here. And if it’s not, it’s not going to go down all the way. Here we go. See. So once we got that in and you want to get your retaining ring for the shaft and the bearing and put that on pair of snap ring pliers, and I’m going to do there, line that up, get your snap ring on, make sure it’s seated all the way down in the group. If it’s not, the shaft needs a couple more tabs to make sure everything is down inside there and seated properly. And the snap ring is fully expanded inside. They had a snap ring groove. What’d you have that done. You could flip over the body kind of straight up, and then you’re going to get your cartridge kit locator pins with those in the hole and installing one O ring for the body.
John Harrison (01:42):
And we’ll put in the, uh, description down below what size the O-ring is that we, if you do lose one, you have a size to get another one and match it up properly. So once you have the O-ring installed in the two pins, then you can go ahead and put your cam ring on. Now at your cam ring does have a directional arrow on it. So that will determine your direction of rotation. That’s always viewed from the shaft end of the pump on these. So if you want to right-hand you want to make sure your arrow is going, right-handed viewed from the shaft end. So once you have that set and you want to install it on the pump, and then you want to put on your rotor and vanes, they do have a rounded edge on one side, this rounded edge is going to go out towards the cam ring.
John Harrison (02:27):
And then you’re just going to slide them right inside the rotor. If some of them do fall out, that’s fine. You can just pick them up and reinstall them. They should have a nice slip fit inside there. And when you get new parts, you always want to measure them and make sure the dimensions between the cam ring, rotor and veins are within maybe a half an valve. If you have too much of a tolerance, then the pump won’t perform, right? And you’ll just start losing flow. As you run your pressure up. Once you have all that installed, you can go ahead and install your pressure plate and just slide it on there. Line it up with the two pins for the cam ring? And you can go ahead and put your other O-ring on there to seal up the cover. Once you install it, last thing is your pressure plate spring.
John Harrison (03:14):
This is going to hold pressure on the pressure on the plate to keep it securely down on the cam ring, keep everything contained inside there. And then you want to put on your cover. So when you install your cover, this is where you could change any kind of porting. If you want it inline with your inlet, you know, that’s normally C porting, if you want an opposite and the amila code, that would be A porting. So we’re just going to do it in line. You can just set it on there, get a couple of bolts.
John Harrison (03:50):
And just slip them through. And you should by hand be able to squeeze down the pressure plate. And then just kind of by hand, at least get one bolt down just to kind of hold everything in place. And then once you get that bolt down, everything should, should be lined up, should be in place. You don’t have to worry about the O-ring extruding out and being cut. And you can just get a simple little impact battery operated, or pneumatic and just zip down the other ones real quick.
John Harrison (04:33):
Now you’re sure all four bolts are down and everything is secured in place. And the last thing you want to do is torque these bolts down from 75 to 80 foot pounds. And that’s it. That’s how you build a little V20 pump. Now, uh, there have been other questions on how to change rotation. Well, you’re just going to pull the, these bolts out and then take this cam ring, uh, and take it off after you remove the cover, this pressure plate spring and the pressure plate. And you’re going to flip the cam ring over. Remember the springs under there. So we’re just going to hold this down while we remove this other bolt.
John Harrison (05:23):
Cover is going to pop up a little bit. So we removed that the spring, this O-ring, and we’ll get this pressure plate off there. So that’s when you can change rotation on your cam ring. Now, if everything else comes up with it, that’s fine. You can just re-install it back on there. So originally we had it as right-hand. Now we’re going to change it. The left hand. You don’t have to change the rotor and vane. You can leave those the way they are. Those are birotational and re-install your cam ring. So now it’s left-handed once you do that, just re-install all the other components.
John Harrison (06:07):
And then if you want to change porting, we can make it a porting for this one, squeeze it down by hand, and we’ll just quickly just tighten this bolt down to hold everything in place. Once that’s locked in place, you can install the other three bolts. Once you have all those installed, we can go ahead and re torque them down 75 to 80 foot pounds, and then you’re all set. Your vane pump is ready to go and be installed in the service.
John Harrison (06:39):
Don’t forget to like us on Facebook and subscribe to our YouTube channel and tune back in for some more videos.
For more information on a V20 Vane Pump, parts for a hydraulic pumps, or to purchase a FluiDyne V20 Vane Pump click here.